Front-End Group Restriction for LearnDash
Control your content without dashboard intervention
3+
Happy customers and counting! write the next chapter of your success with us
Front-End Group Restriction for LearnDash
Plugin Version: 1.0
Released on: 4th Nov 2022
LD Version: 3.0 or Higher
Tested Upto: 6.1
Requires PHP: 7.0
Getting Started
Are you seeking to share responsibilities with group leaders while maintaining control over dashboard access?
Administrators can assign content control to group leaders using Front-End Group Restriction, which divides the work and simplifies access control without requiring WordPress dashboard involvement.
You can visit our website to get this plugin before we start.
Install and Activate Plugin
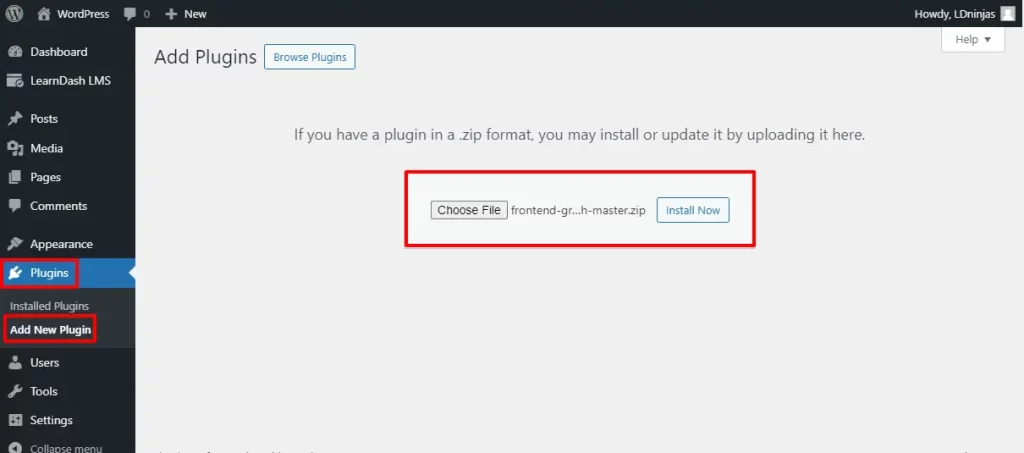
To upload your plugin, go to Dashboard ➡ Plugin ➡ Add New.
Then Upload Plugin ➡ Choose File ➡ Install Now.
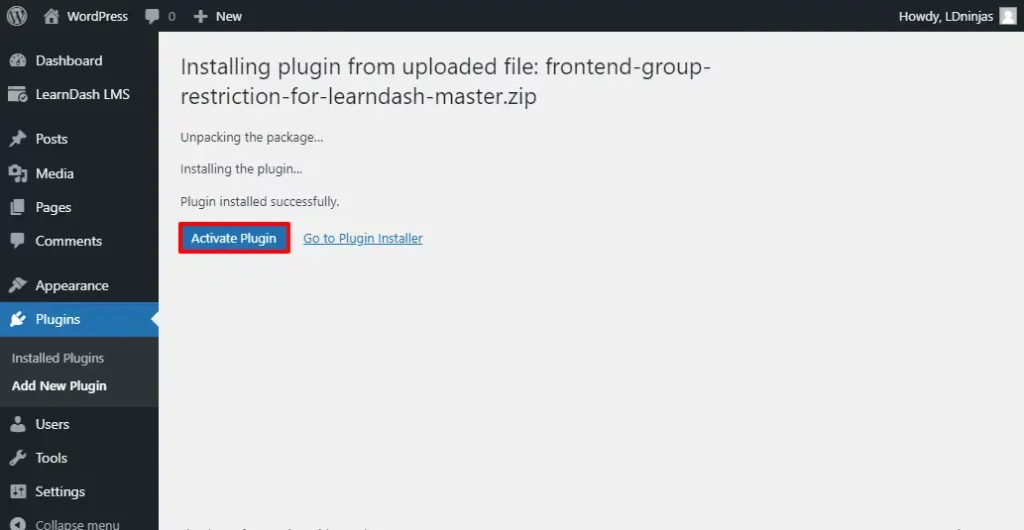
Click on Activate Plugin once the installation is complete.
You can access the Frontend Group Restriction for LearnDash by going to the LearnDash LMS ➡ Group Restriction.
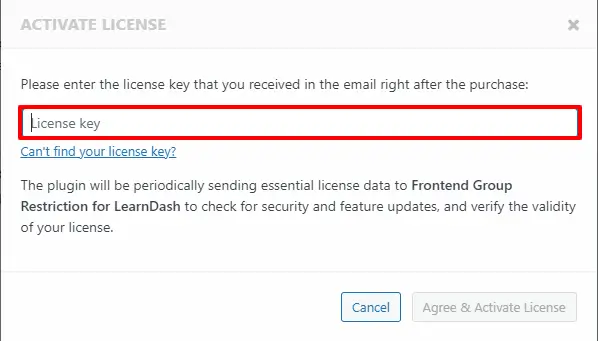
As soon as you click on group restriction, a message will appear on the window asking for the license key.
Enter the license key for activation and prepare your group with Frontend Group Restriction for LearnDash.
How to Restrict Lessons/Topics/Quizzes
To restrict any course/ lessons/ topics/ quizzes, choose the Edit Page ➡ Restriction Tab.
I want to add a restriction to one of my courses, so navigate to the course edit page and then the restriction tab.
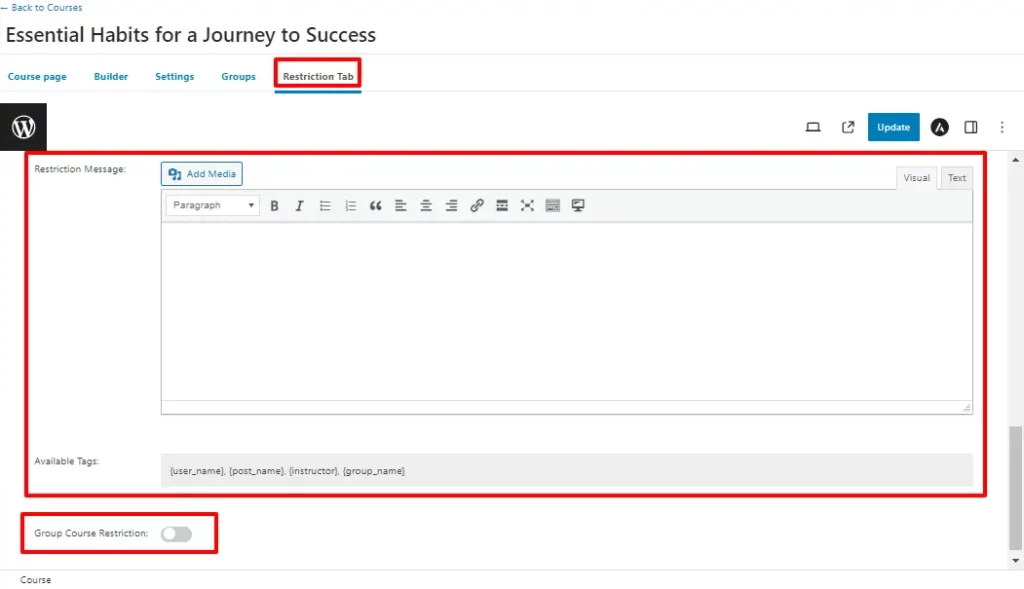
Write your restriction message specifically for this course with the help of the given tags.
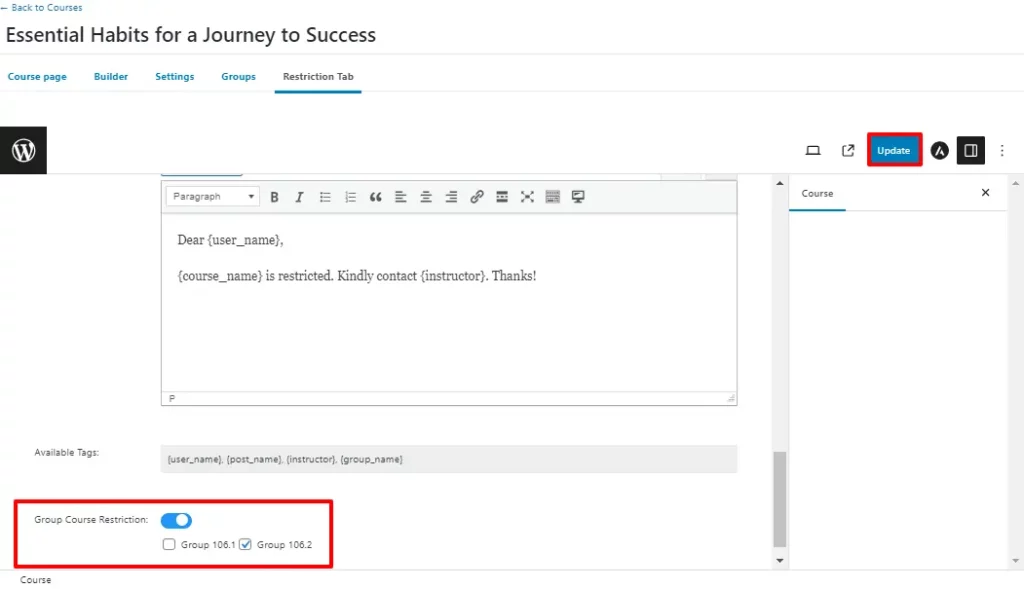
If you enable the Group Course Restriction button, a list of all groups will be available in which your course is included.
Tick mark the groups where you want to add restrictions for your course and click on update.
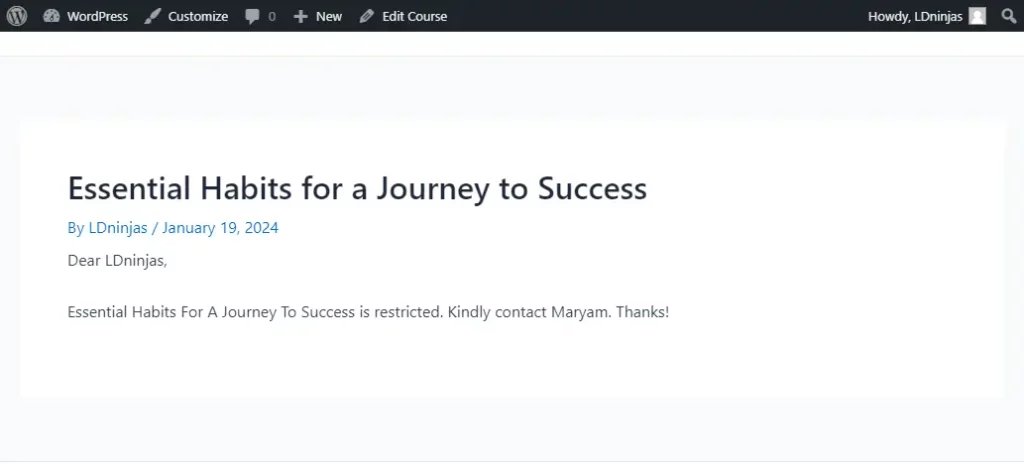
Let’s check the result at frontend user interface.
The same method will be applied for lessons, topics, and quizzes.
Enable Group Leader to Restrict Lessons/Topics/Quizzes
Group leaders can also configure these settings from the frontend.
Go to the LearnDash ➡ Group Restrictions ➡ Restriction Shortcode.
There’s a shortcode on the settings page that restricts courses available in groups. You can utilize it in two ways. You may either copy the shortcode and paste on a specific page or apply it to one of the pre-designed pages listed in the Apply Shortcode dropdown. Click on Save Setting to make changes accordingly.
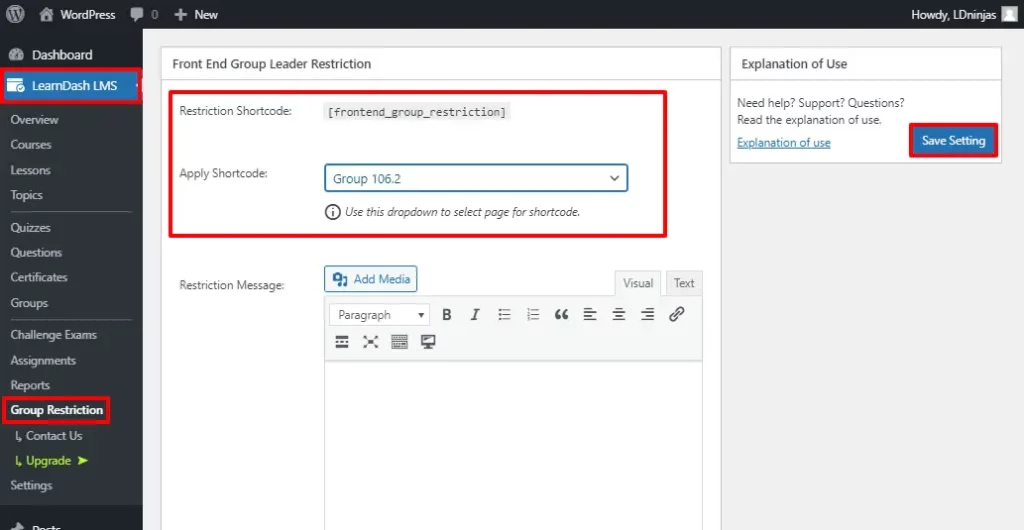
The group leader will be able to directly control their courses once you apply the shortcode, which gives them access to that frontend page.
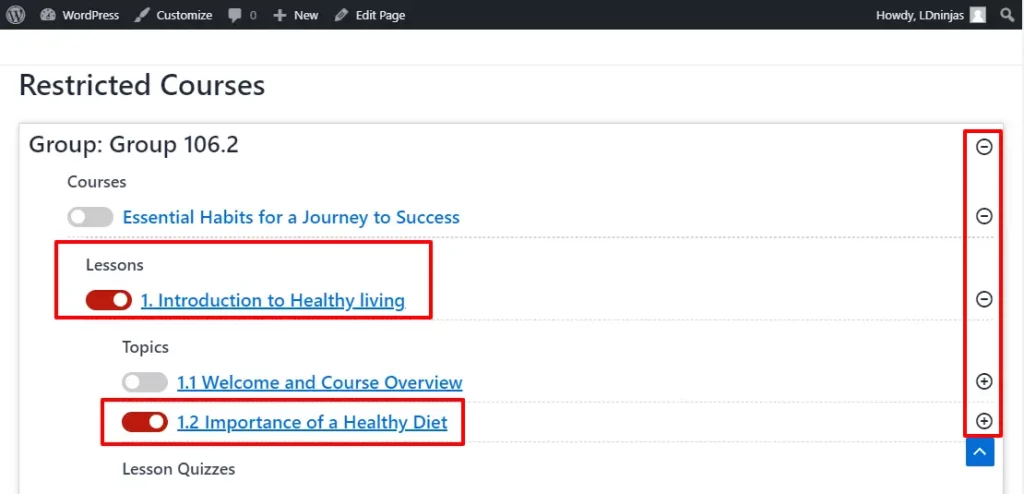
Group admin can access all of a course’s lessons, topics, and quizzes in a drop-down menu by clicking on the ‘+’ icon. Toggle the button for the lesson or topic to which they want to apply restrictions.
General Settings
The Group Restriction panel contains several options other than restriction shortcode and we are going to check them in different steps for better understanding.
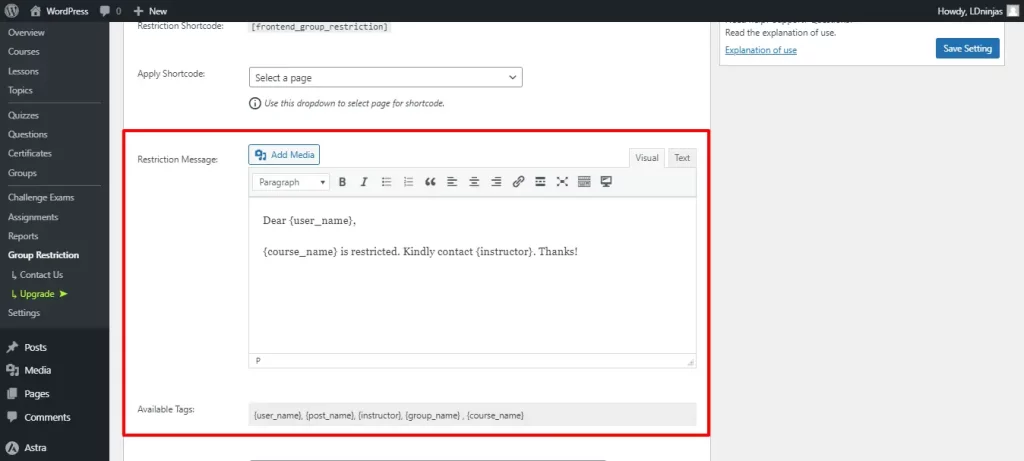
1. Restriction Messages
Use this content box to write the global restriction message for every course, lesson, topics or quizzes rather than specific message from the restriction tab. The same message would apply everywhere you enable restrictions. Tags are also available that can be used in your message.
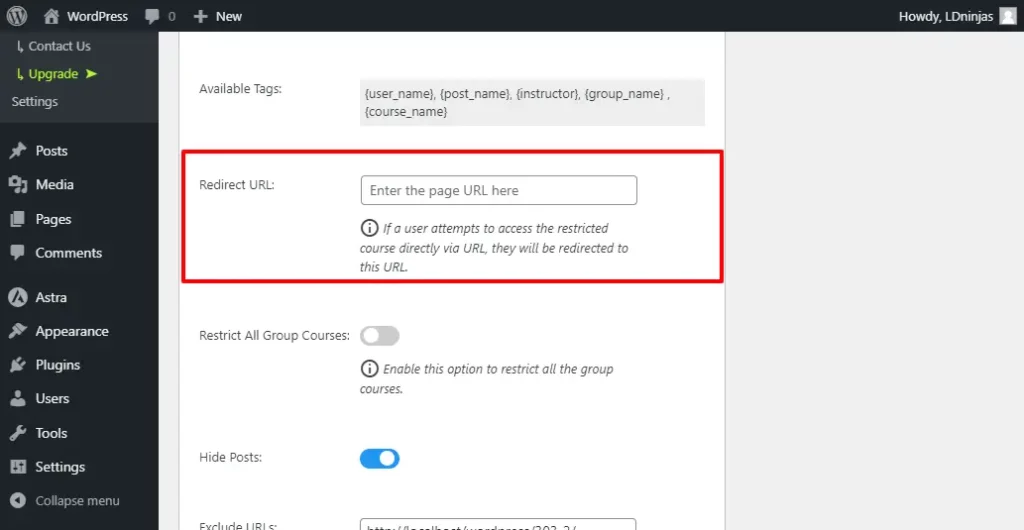
2. Redirect URL
This feature enables you to redirect users who attempt to access the course link to an alternate webpage if you have placed restrictions on the course, limiting access to users within particular groups. Simply, it gives you the ability to direct users to another location if they are not authorized to access the course.
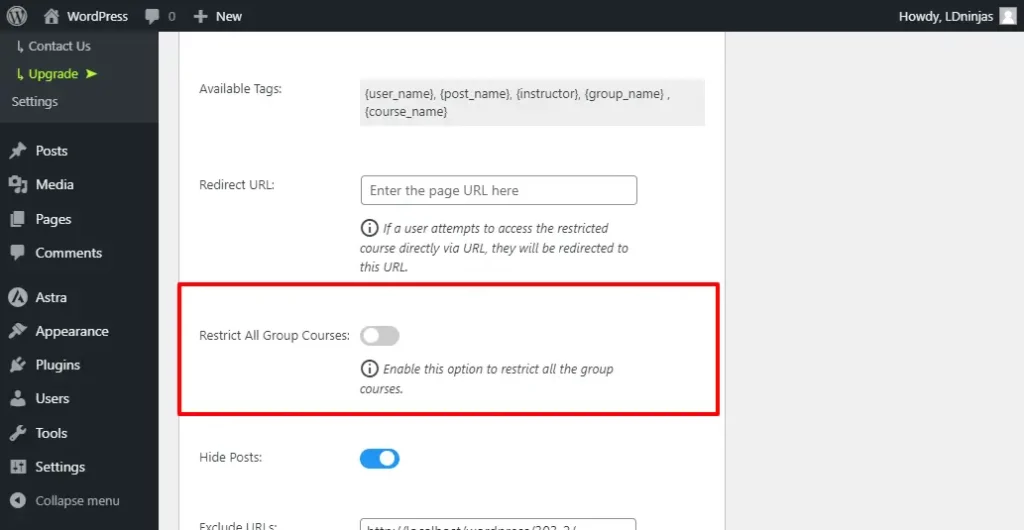
3. Restrict All Group Courses
You can use this option to apply restrictions to all group courses at once. However, keep in mind that this will impose restrictions to all group courses unless you have previously established specific restrictions during the course creation process.
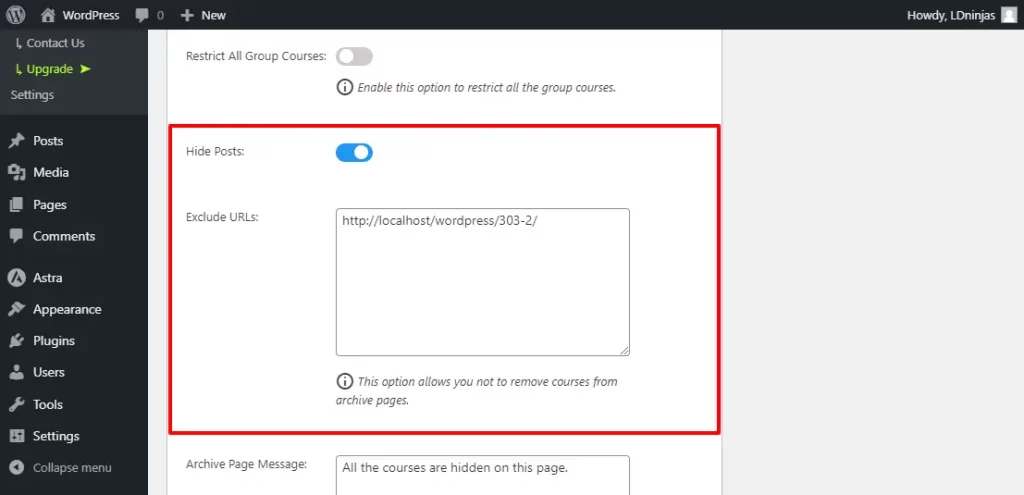
4. Hide Posts
If you enable the Hide Post feature, your posts will be hidden across the entire site wherever they are. However, if you want a specific restricted course not to be hidden on certain pages of your website, you need to use the Exclude URLs dialogue box below to enter the URLs of those pages. This way, even if your restricted course is hidden globally, it will remain visible on the pages you have excluded.
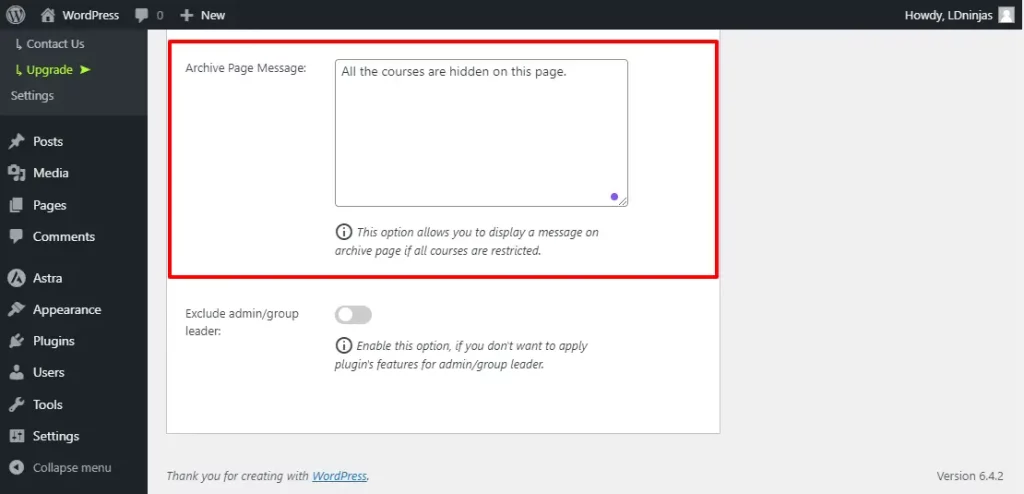
5. Archive Page Message
Enabling the hide post option causes all restricted courses to be hidden on the archive page as well, leaving it blank. In such a situation, the archive page displays all your courses. Therefore, you can write a custom Archive Page Message that will be shown on the page when all restricted courses are hidden, providing an explanation for the blank page.
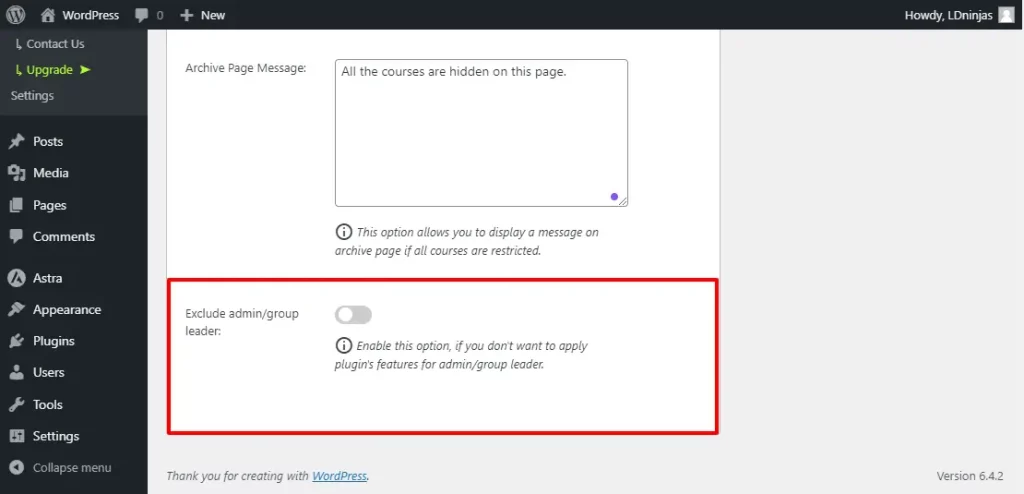
6. Exclude admin/group leader
This option is helpful if you don’t want to apply the plugin’s restriction functionality for group leaders or admin. Enable the button and the administrator or group leader will therefore be unrestricted and able to view the courses.
