Drip Feed Content Extended for LearnDash
Unlock the Secret to Consistently Engage and Motivate Your Learners
13+
Happy customers and counting! write the next chapter of your success with us
Drip-Feed Content Extended For LearnDash
Plugin Version: 1.6
Last updated: 12th Jan 2024
LD Version: 3.0 or higher
Tested up to: 6.4.2
PHP Version: 7.0 or higher
Getting Started
Unlock the Secret to Consistently Engage and Motivate Your Learners
Let’s start to see how its innovative features improve your online courses by smoothly adjusting the pace of the content.
Before we start, you may visit the website to purchase the plugin.
Install and Activate the plugin
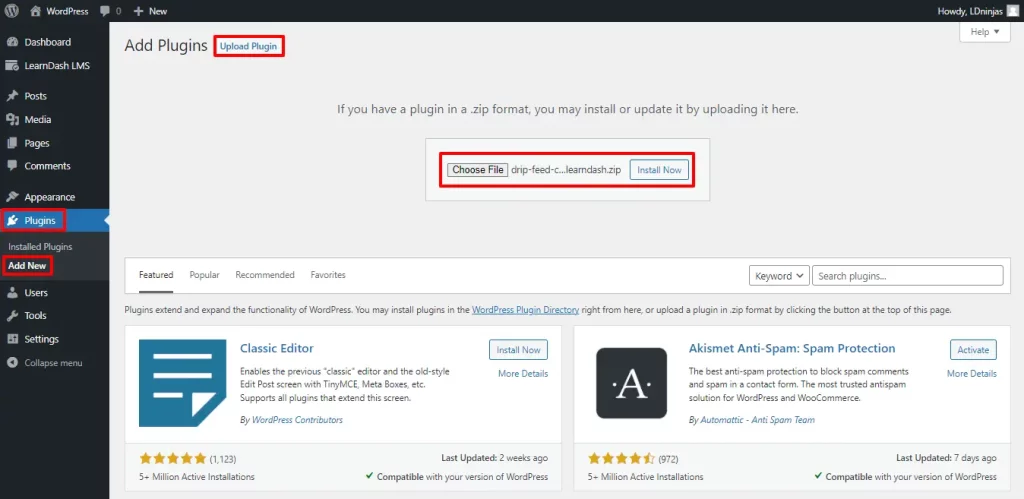
To upload your plugin, go to Dashboard ➡ Plugin ➡ Add New.
Then Upload Plugin ➡ Choose File ➡ Install Now.
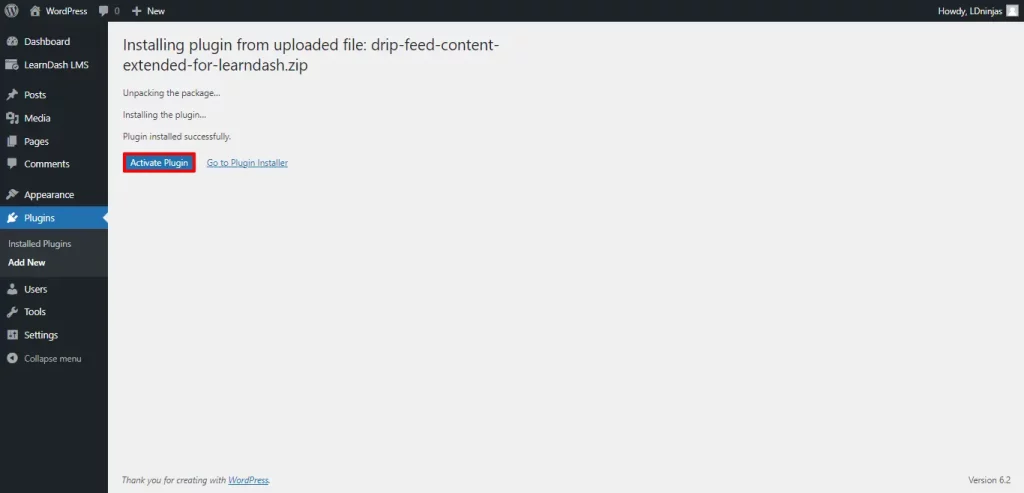
Click on Activate Plugin once the installation is complete.
It is available under the LearnDash segment.
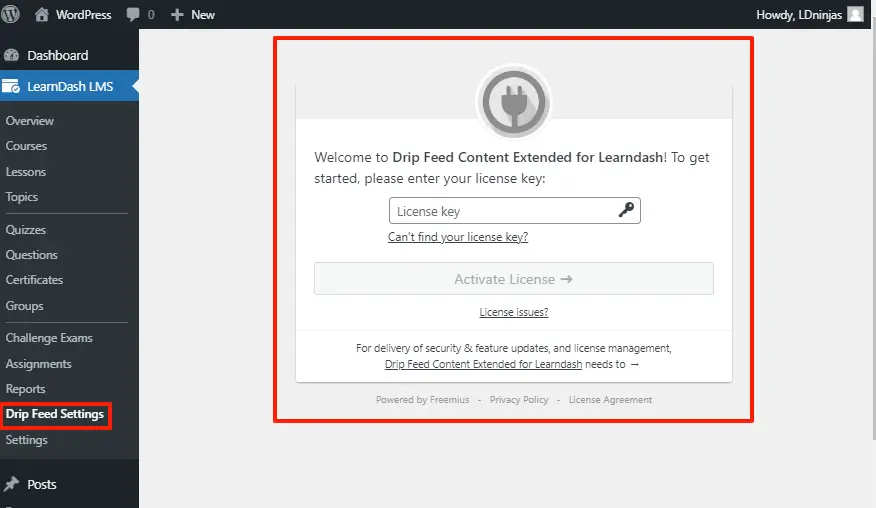
You can access the Drip Feed Content settings by going to the LearnDash LMS ➡ Drip-Feed Settings.
As soon as you click on Drip-Feed Setting, a message will appear on the window asking for the license key.
Enter the license key for activation and prepare your course with drip-feed content extended for LearnDash.
How to setup Drip-feed Content
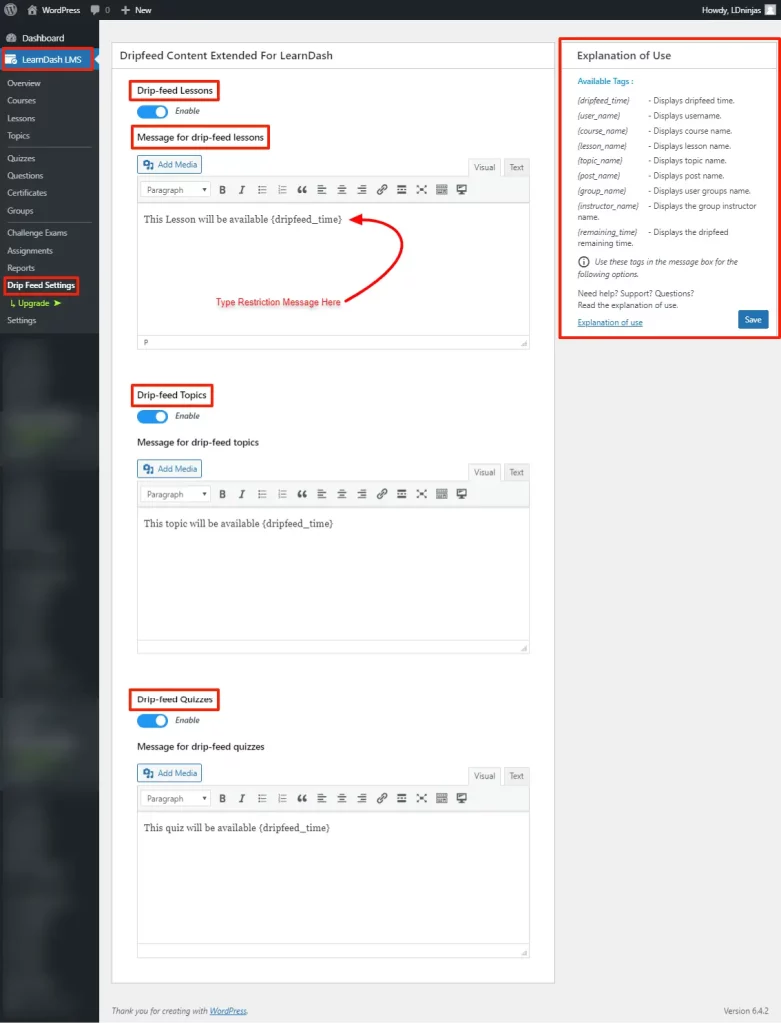
Here, drip-feed lessons, topics and quizzes are disabled by default.
If you want to create drip-feed lessons, topics or quizzes just enable the options according to the need separately.
You also have an option to add a global Restriction Message for each one of them.
This Lesson will be available {dripfeed_time} is set by default. You can customize the message using any of the options provided in the right-hand side panel.
Let’s see how to drip-feed lessons.
How to Set Up a Drip-Feed Lesson
We already know that by default the LearnDash setting tab has a Lesson Release Schedule with three options.
Immediately: The lesson will be available immediately after enrollment.
Enrollment-based: The lesson will be accessible after X days of enrollment.
Specific date: Lessons will be available on a specific date and time.
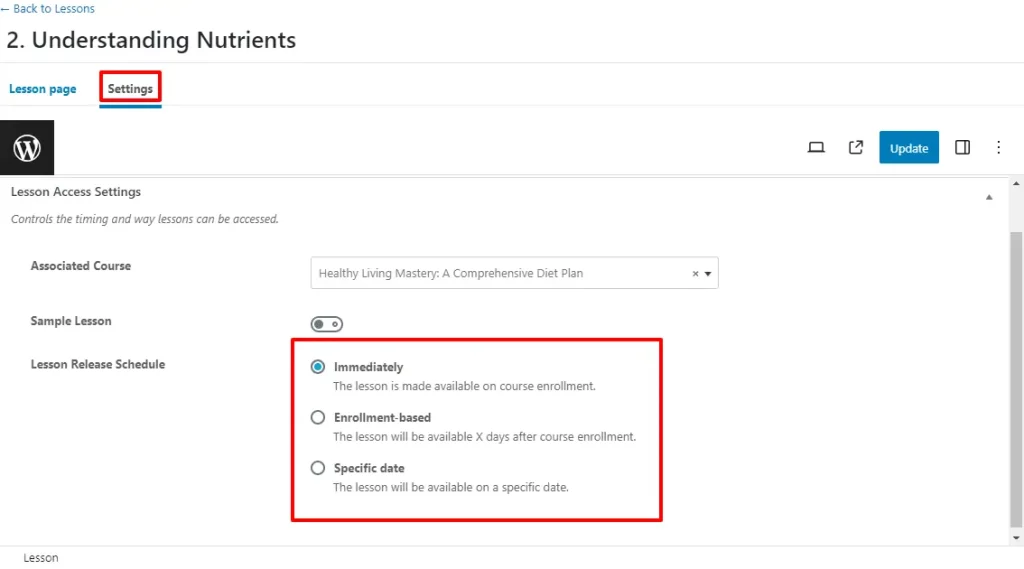
Drip-feed Content Extended for LearnDash adds one more option, Lesson based, here.
Choose the Lesson-based option when you want to release a lesson at a specific time after the completion of a specific lesson.
By default, it is set on 0, minute(s) and select lessons.
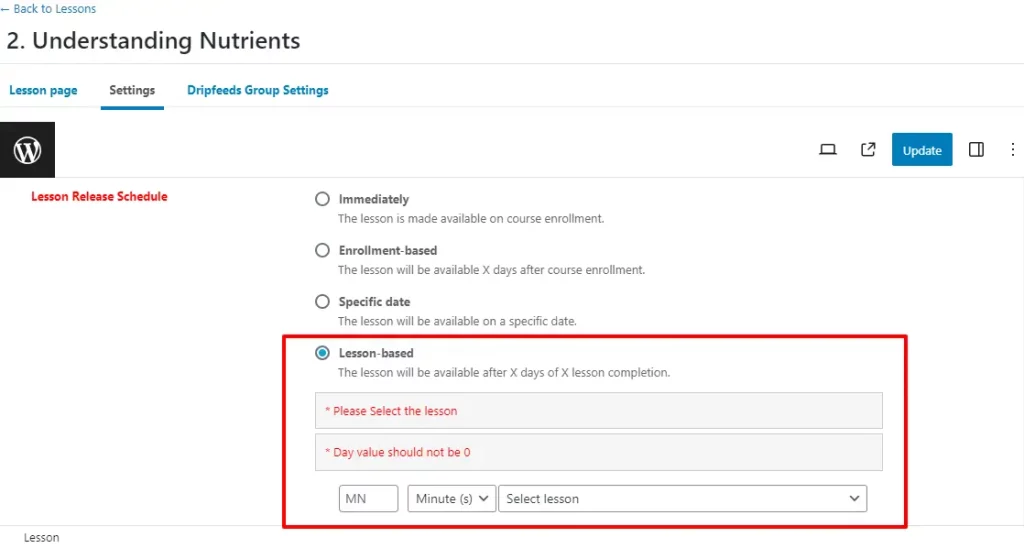
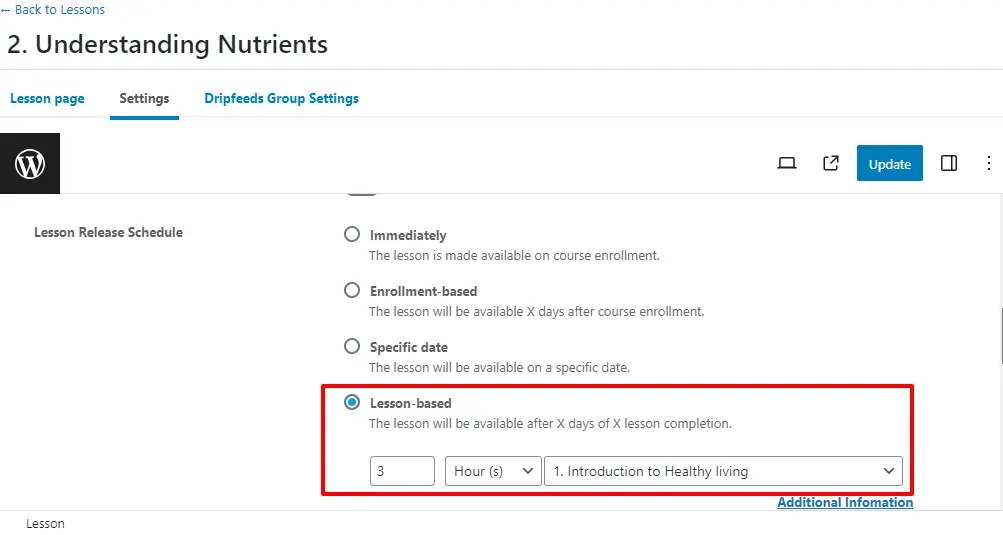
Select the minimum number, choose between minute(s), hour(s) and day(s). Also select the lesson from the drop-down after which you want to release this lesson.
For example, I want to release my lesson – “Understanding Nutrients” three hours after the completion of “Introduction to Healthy Livings”, my option would be something like this.
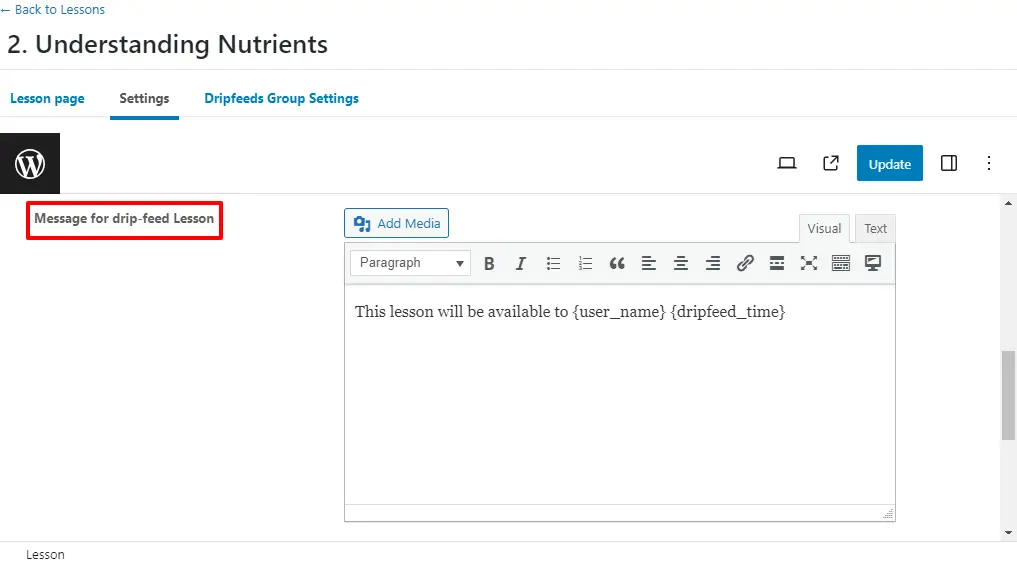
If you scroll down, you will find a text box for a restriction message that applies to this lesson.
Let’s check our lesson-based drip-feed content on the front-end user interface.
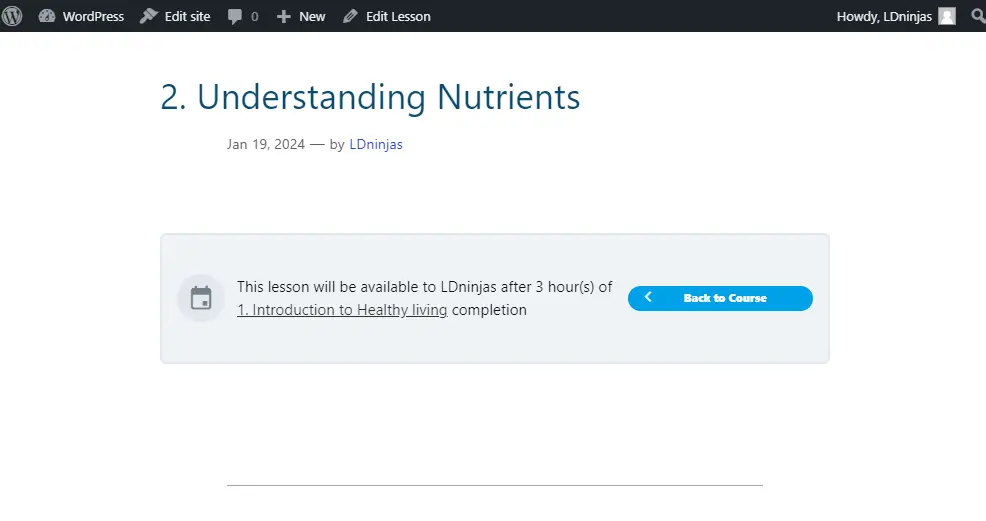
Our designed lesson is live now with all instructions and restrictions.
To create drip-feed content for topics and quizzes in LearnDash, you can follow the same method as for lessons. Simply create the topics and quizzes, and then select the option to schedule or drip-feed them on a specific timeline.
How to Set Up a Drip-Feed Group
Now move to the drip-feed group setting tab and see what options are available here.
For this purpose, click on Lesson ➡ Dripfeeds Group Settings.
Let’s delve deeper into the drip-feed group settings tab and explore it in a more engaging and informative way.The Drip-Feed group settings tab contains a Lesson Release Schedule to define the criteria so that the lesson is dripped out in one of the three ways and a Message for Drip-Feed Lesson for a specific lesson.
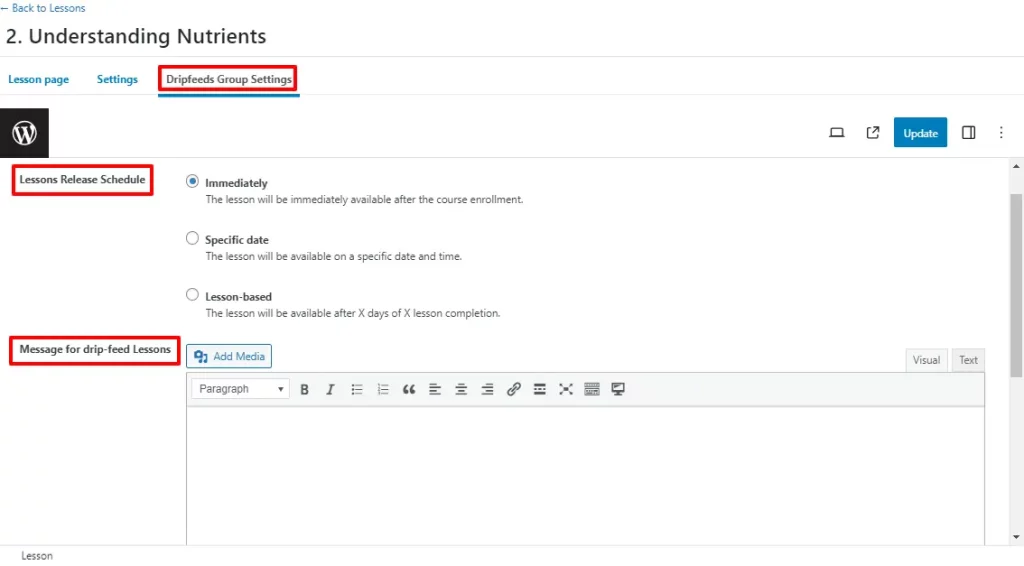
Group Lesson release schedule has three different options to drip-feed your lesson.
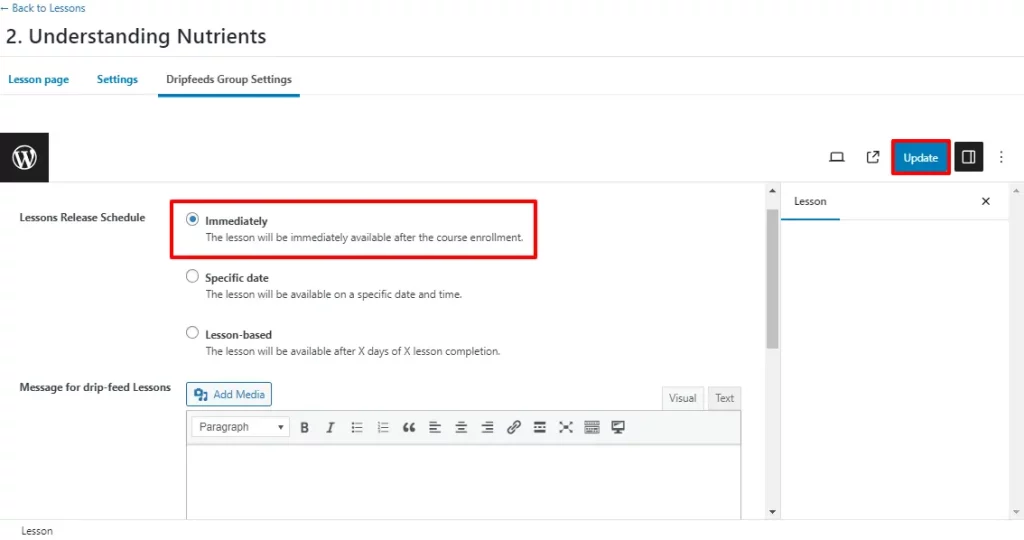
1. Immediately
Choose the Immediate option if you want users to have immediate access to lessons upon course enrollment.
Click on Update.
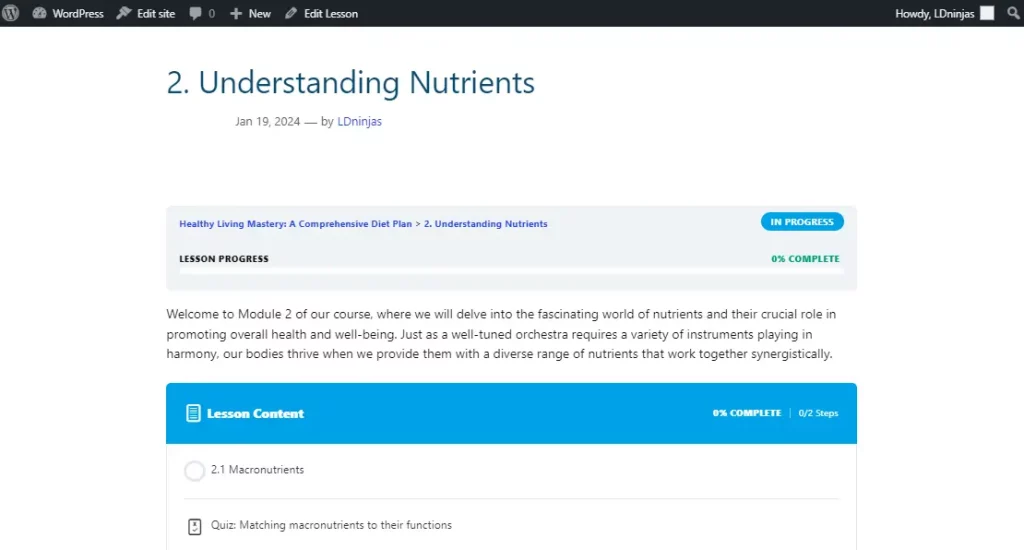
As soon as users enroll in the course, they’ll get immediate access to all the course materials, which will be conveniently organized and displayed on their tabs. There will be no waiting period, and they can start their learning journey right away.
2. Specific Date
Use the Specific Date option if you want to make the lesson available at a certain time and date without consideration of the enrollment date.
The time and date you want the content to be accessible to your users must be entered here, and then press the update button to save the instructions.
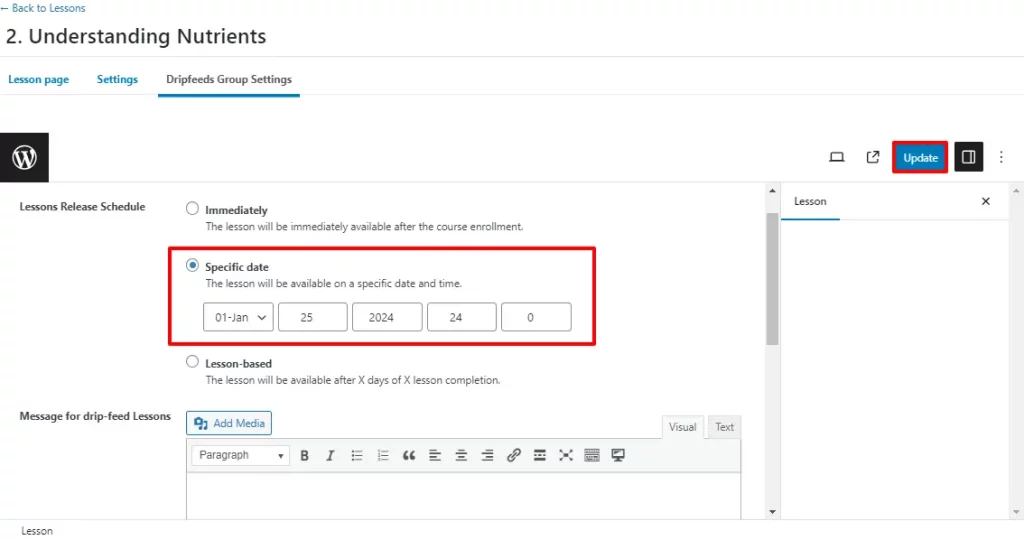
The information you have scheduled for your lesson is displayed on the user’s screen as a message.
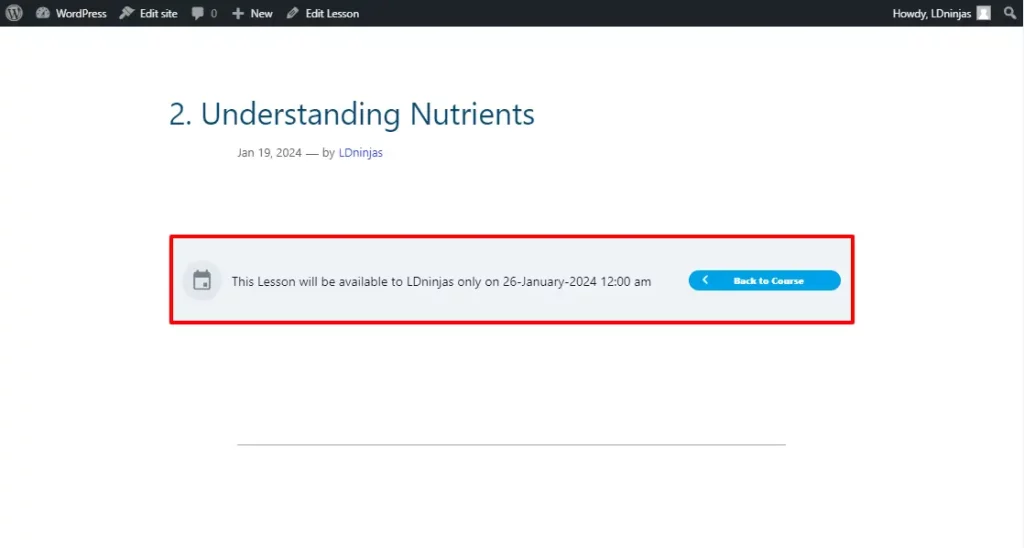
If you observe closely, this is the same message that we entered in the drip-feed setting.
3. Lesson Based
Use the Lesson Based option to make the lesson content accessible when a specific lesson from the same course has been completed after X days, minutes, or hours.
Here, you must indicate the time and lesson for which you want your users to have access to the content.
Click on Update.
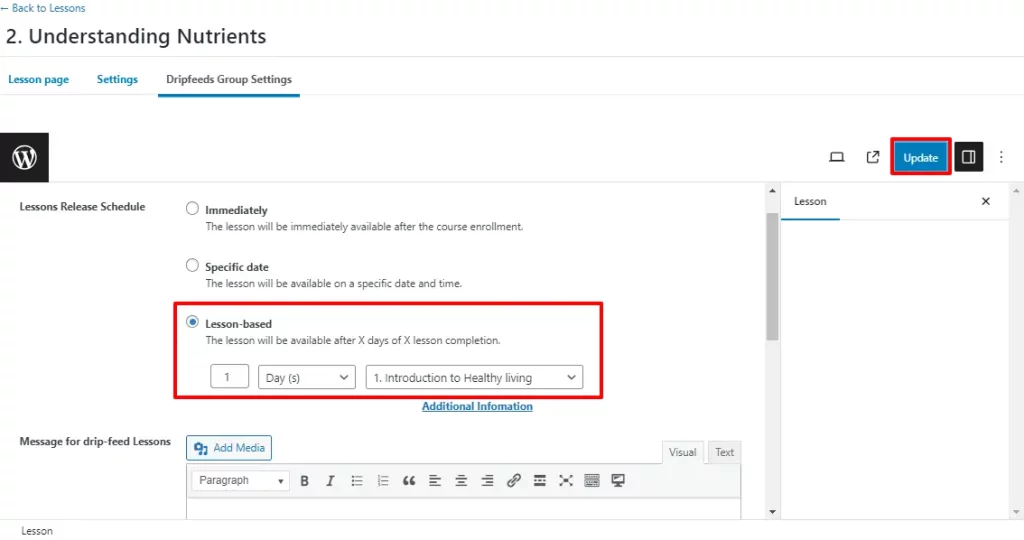
When a lesson is scheduled for lesson-based, a message will pop up in a window to notify about the schedule.
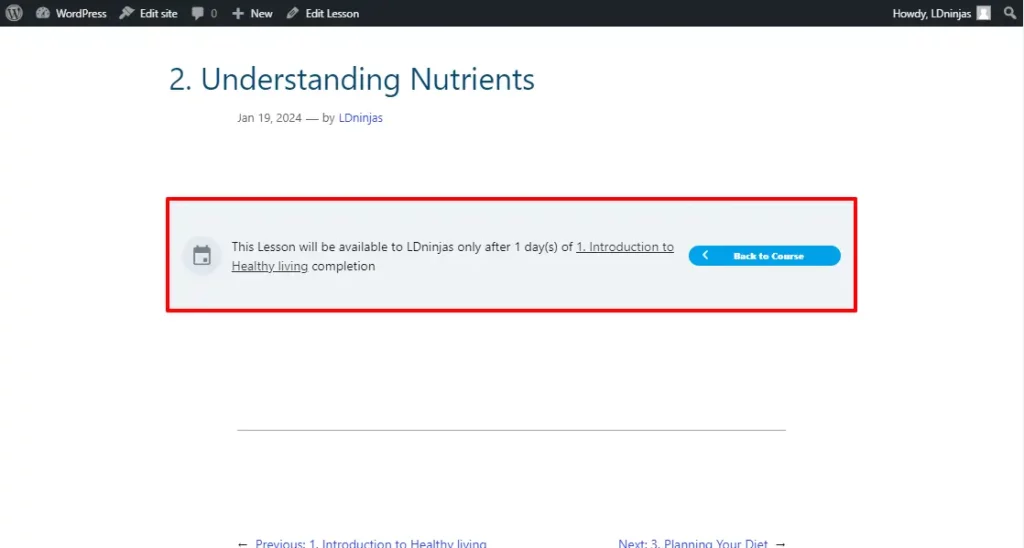
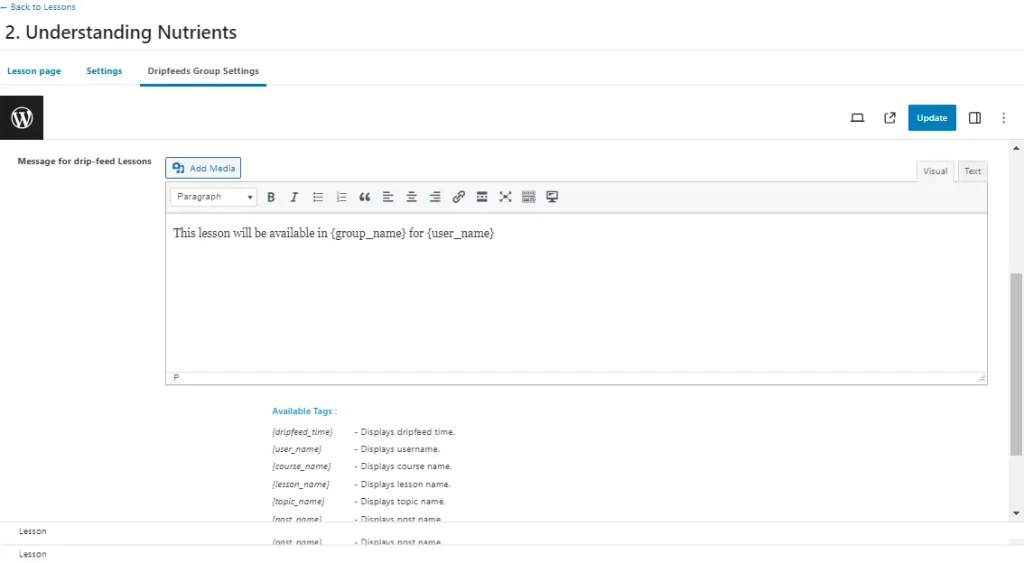
In the same tab, you will find a dialog box for Message for Drip Feed Content to add a restriction message for each lesson.
Lets create a different message only for this lesson compared to the global restriction message.
Now check the result.
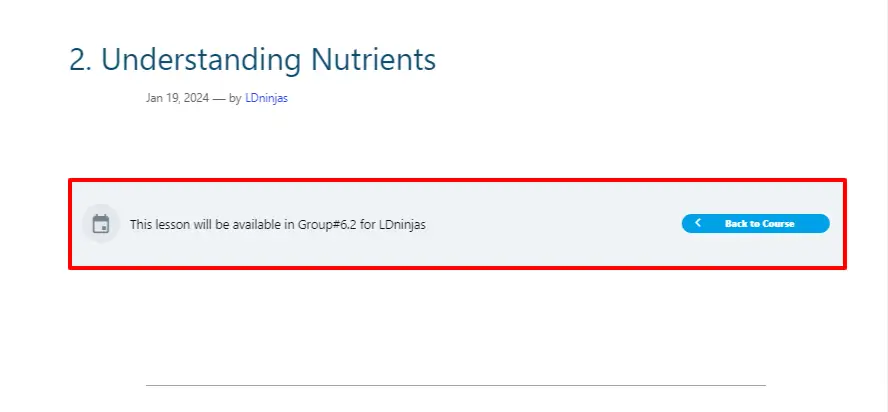
The message for this lesson is different from the global restriction message because specific instructions have been given for this lesson.
And successfully, you have created a drip-feed lesson.

