

Custom Tabs for LearnDash
Step to step guideline to use this plugin
69+
Happy customers and counting! write the next chapter of your success with us
Custom Tabs for LearnDash
Introduction
Features
Helps you with
Getting Started
Install and Activate Plugin
How to Set up Custom Tabs
Course Configuration
Configure Tab Order
Global Settings
Precautions
Plugin version: 1.13
Last updated: 17th Aug 2023
LD version: 3.0 or higher
Tested up to: 6.3
PHP version: 7.0 or above
Getting Started
Step to step guideline to use this plugin
In this blog we are going to learn how to set up custom tabs for your LearnDash courses.
Before we start, you may visit the website to purchase the plugin.
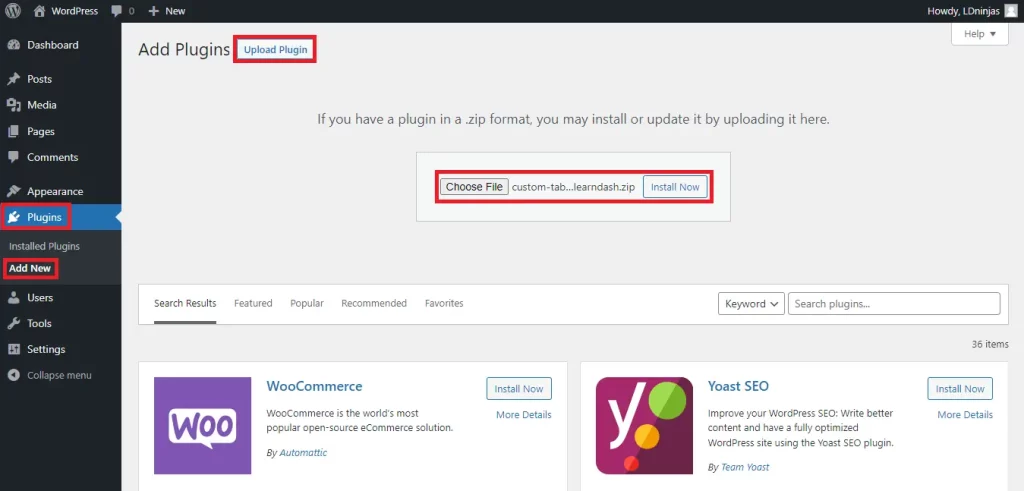
Install and Activate Plugin
To upload your plugin, go to Dashboard ➡ Plugin ➡ Add New.
Then Upload Plugin ➡ Choose File ➡ Install Now.
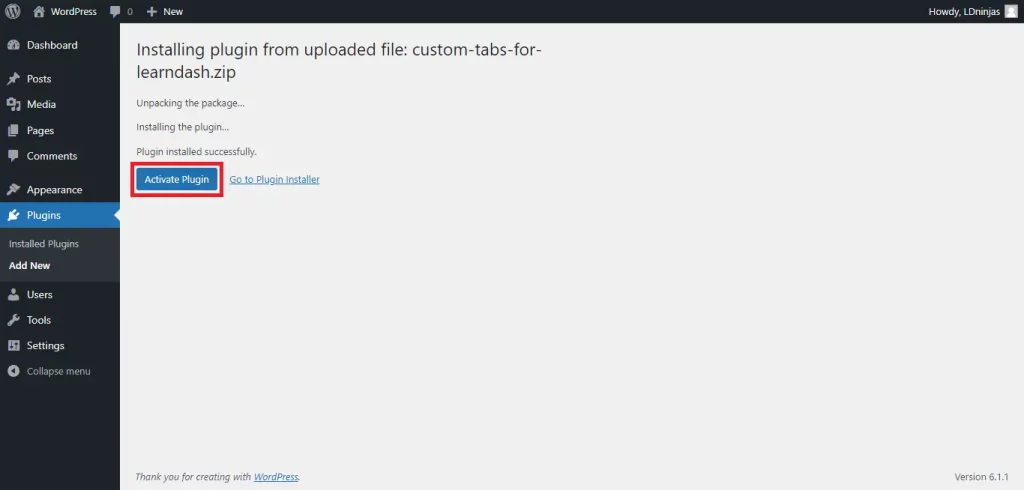
Click on Activate Plugin once the installation is complete.
First, activate the LearnDash Custom Tabs add-on using the license key.
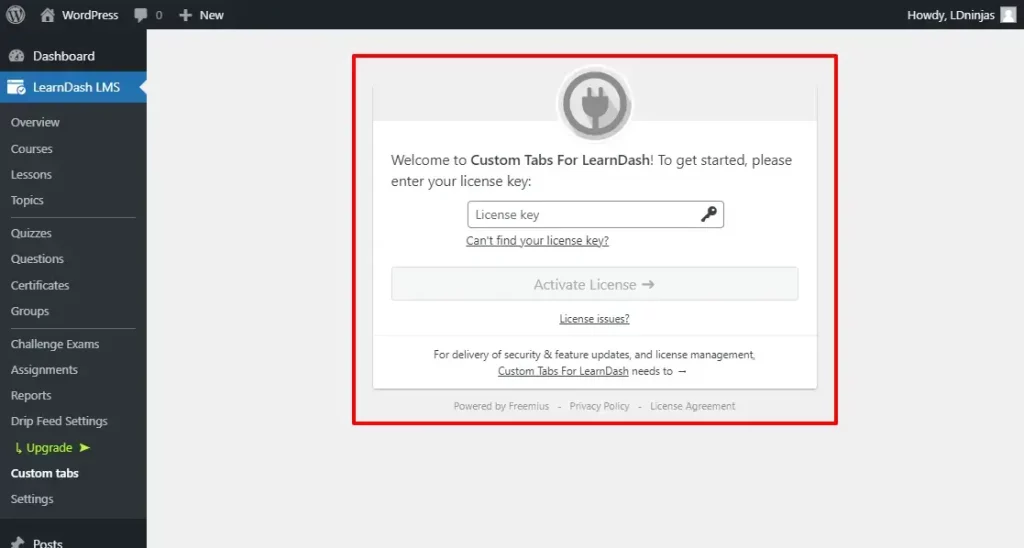
You will see the Custom Tabs sub-menu once the add-on has been activated.
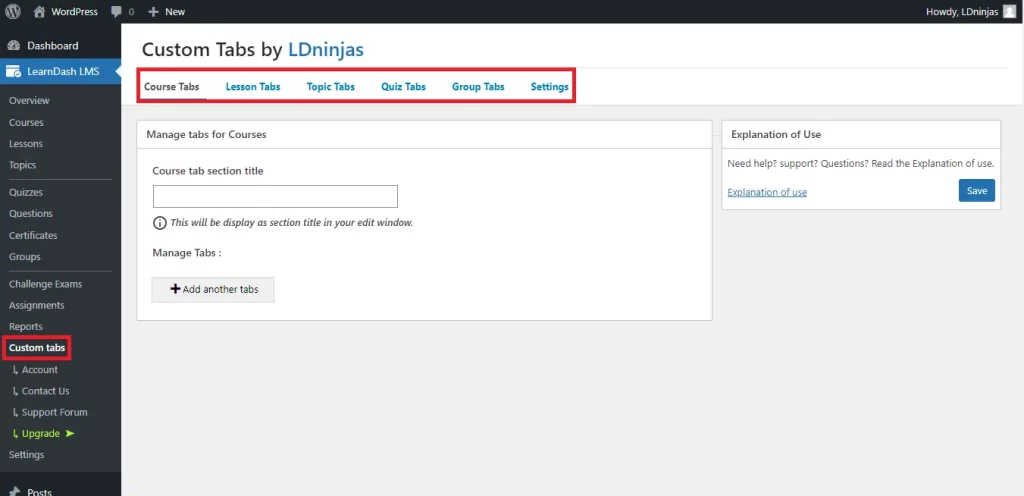
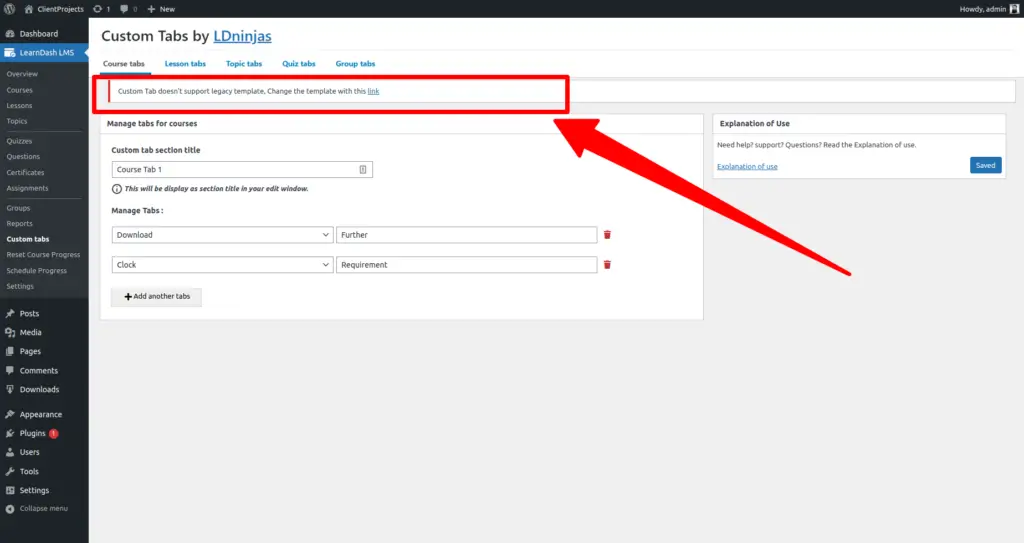
How to Set up Custom Tabs
Let’s see how to set up Custom tabs in courses.
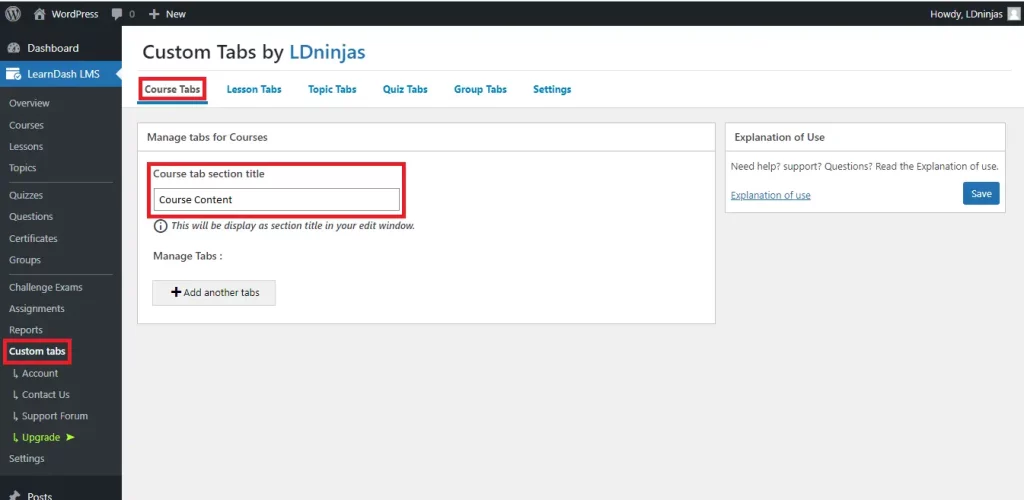
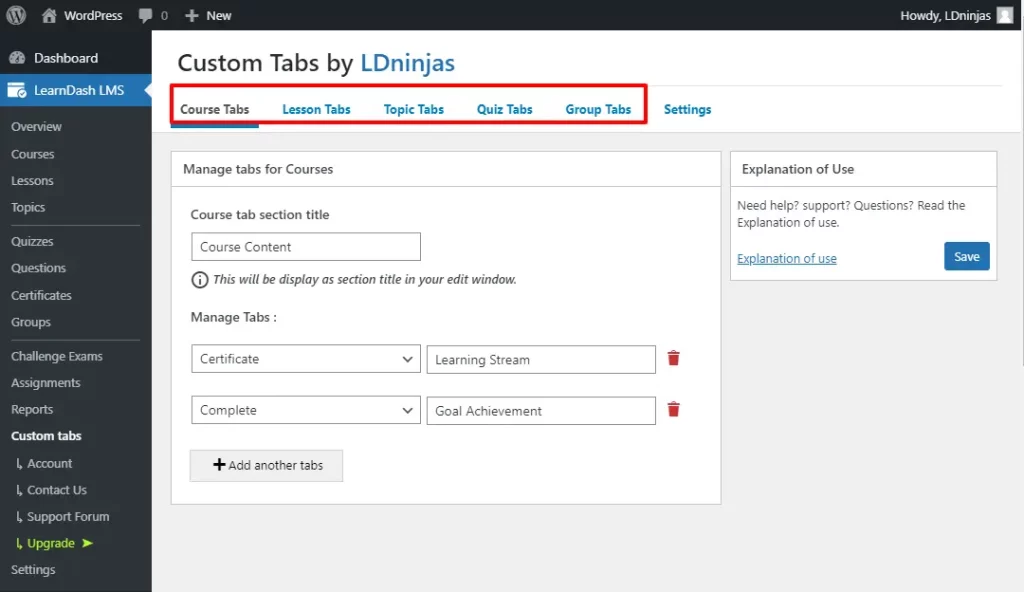
Go to the Custom Tabs ➡ Course Tabs
Write the title in the Course tab section title.
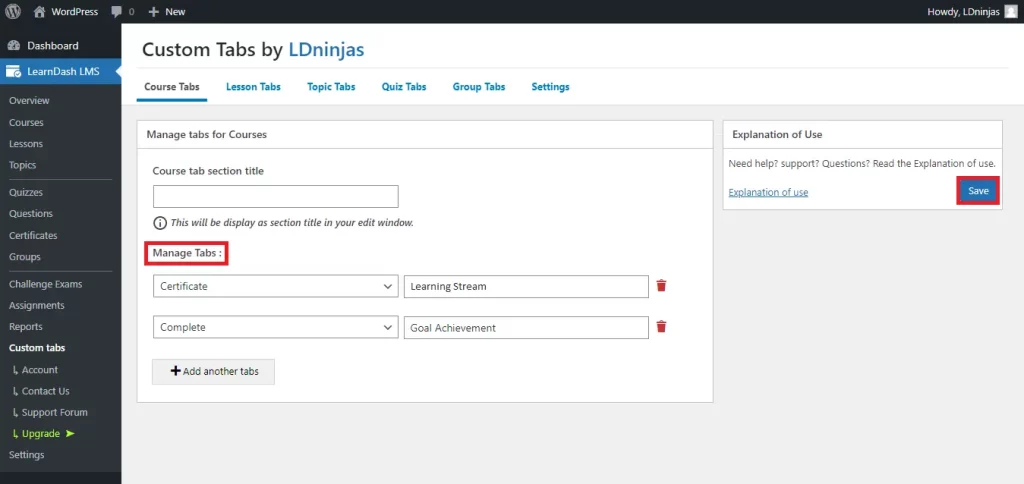
Click on Add another tabs.
Manage tabs by selecting icons, tab name and don’t forget to click on Save.
It’s time to move on and configure the Custom Tabs in the pre-designed courses.
Click on LearnDash LMS ➡ Course.
Select the course where you want to use Custom Tab.

Go to the Course Tabs.
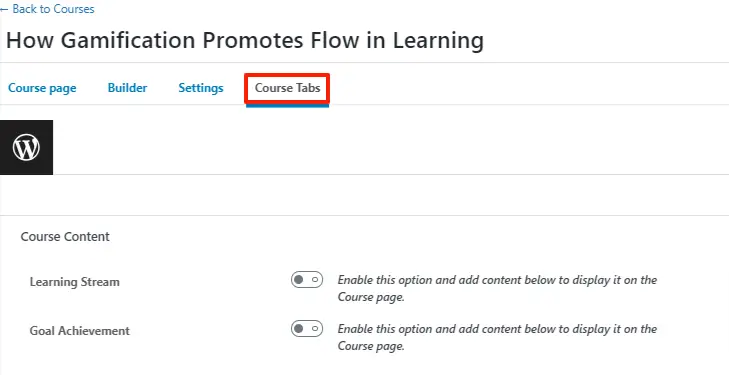
All the tabs you have organized in your custom tabs will be visible here. We have created two tabs so both are available.
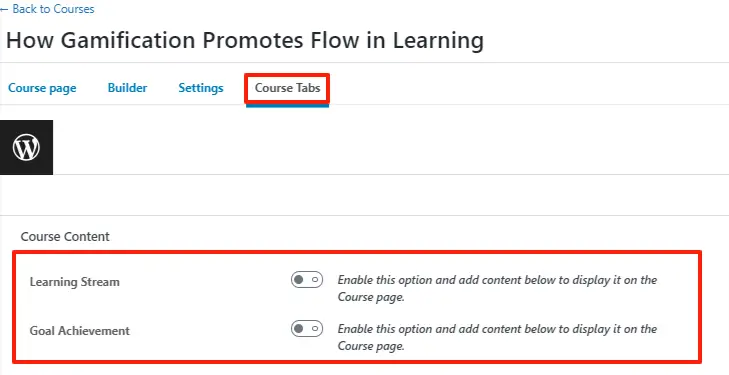
These tabs are disabled by default.
Let’s enable the first tab and explore what options it has.
A tab edit panel will appear as soon as you enable the tab.
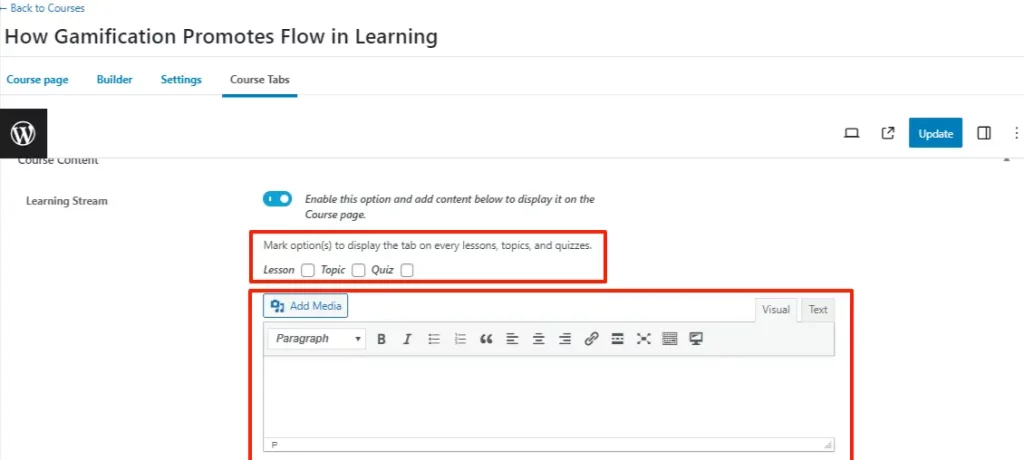
If you want to make this tab appear in it’s lesson, topic or quiz then mark the desired option.
For instance, I want to show only this tab in the quizzes too.
So, click on the quiz.
And add the content of course tab in the text box then click on update.
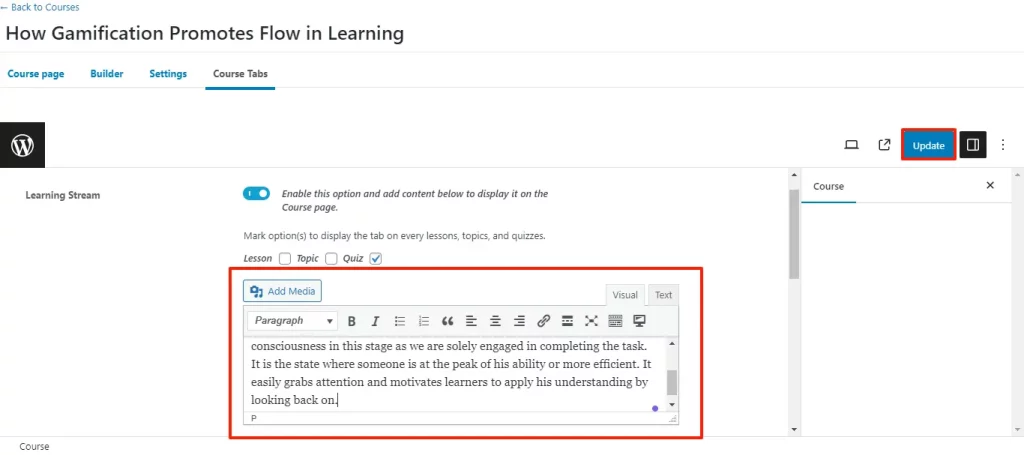
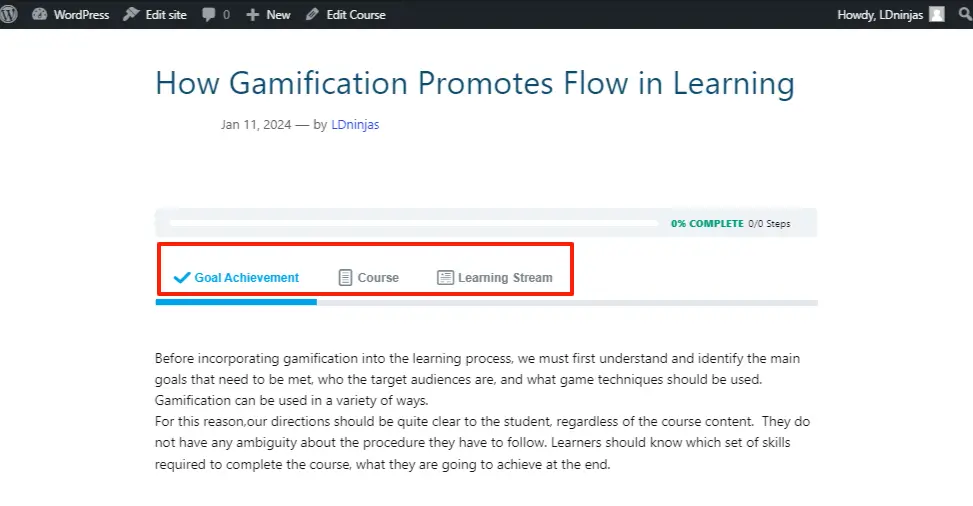
Your Custom tab is ready to go live.
Visit your front-end user interference to check your enabled tabs.
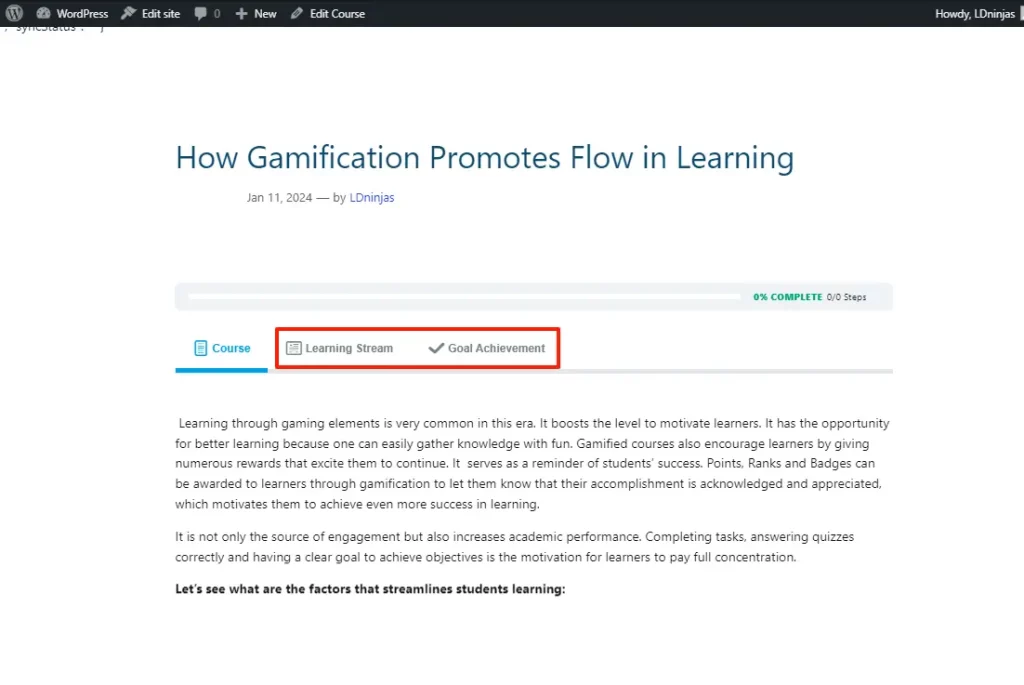
Our Custom Tabs are successfully published.
In the same tab you have also an option to reorder/rearrange the course tabs.
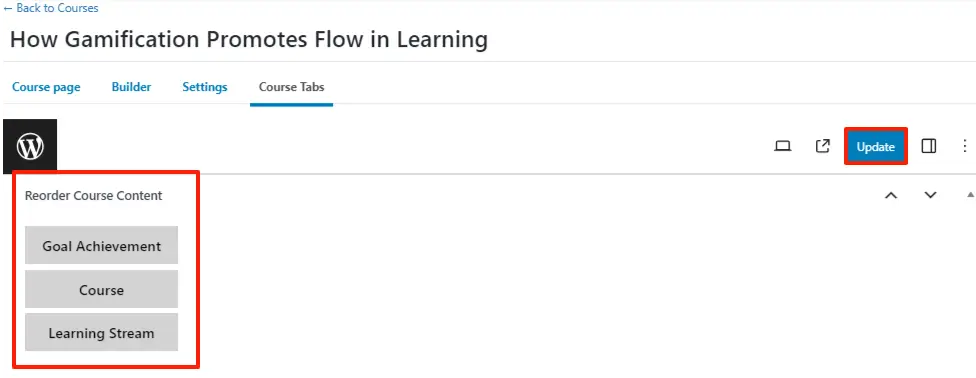
Just drag and drop the course tabs, arrange them according to your choice, and then update.
Let’s check the rearranged course tabs.
As you can see the courses are in reordered form.
Same procedure would be followed for lesson, topic, quiz and group tab.
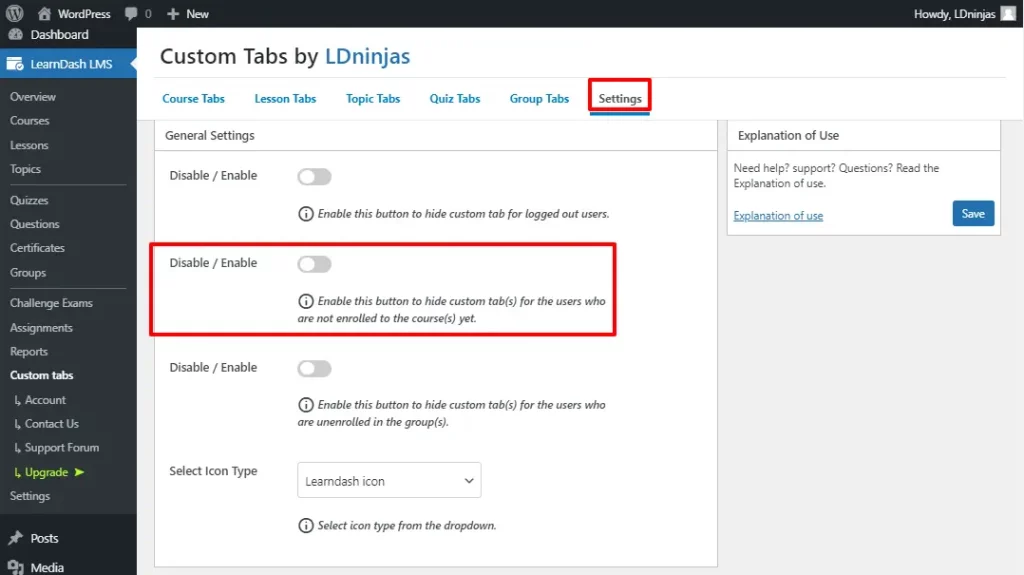
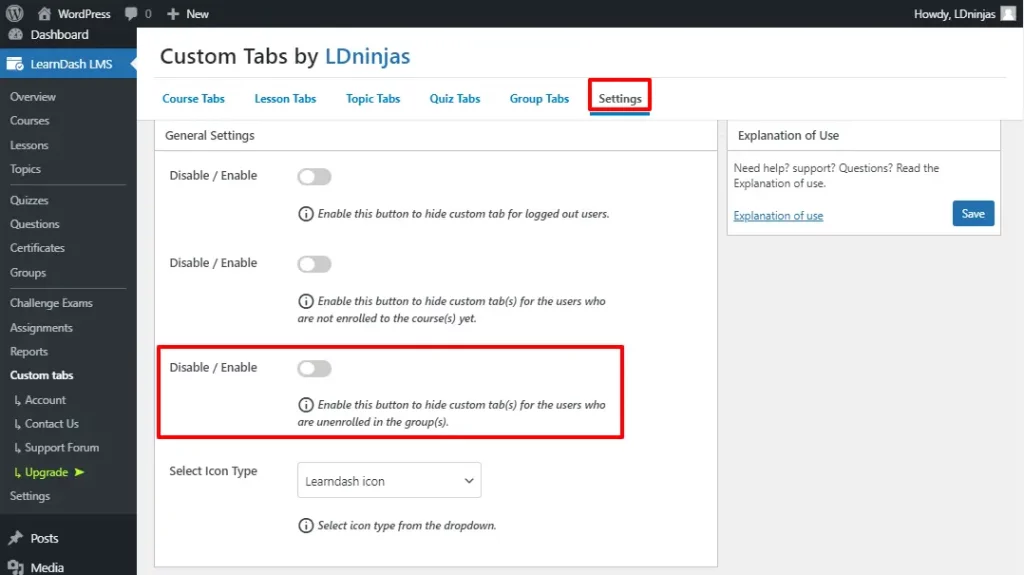
So, settings contain four options for your custom tab.

These options are disabled by default, if you want to use any of them just toggle the button and click on save.
- Your custom tabs are visible to logged out users too, if you want to hide the custom tabs from the logged out users then enable the button.
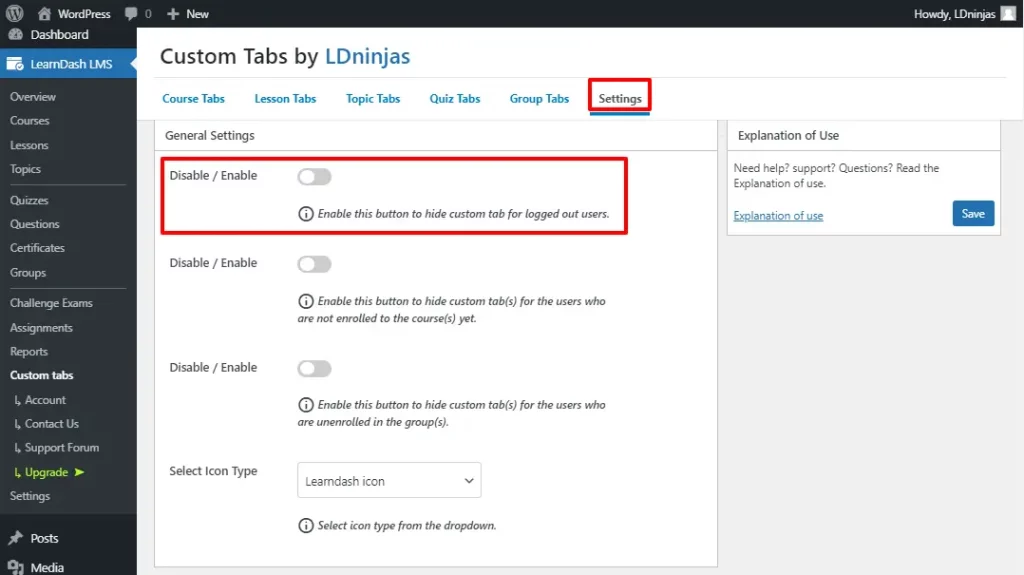
- Toggle the button if you want to keep your custom tabs hidden from people who aren’t registered in courses.
- This option is related to groups.
In such scenarios custom tabs will be visible to the user who becomes unenrolled from the group. Enable the button if you want to keep it hidden from users who aren’t enrolled to the group.
Last but not least, the final option is related to the icon type.
This drop-down contains three icon types.
- Learnash icon
- Dashicon
- Font Awesome
The LearnDash icon is set by default.
Select the icon type you want to use with your custom tabs from the menu.
Remember to Save your changes when you’re finished.
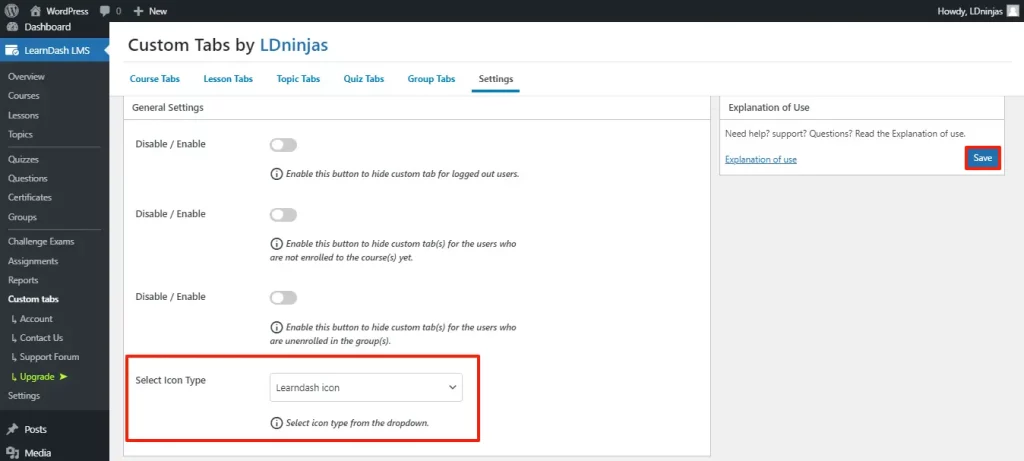
When choosing either Dashicon or Font Awesome from the dropdown menu, you must have to enter icon class when managing Custom tabs.
Please check the links for your icon class.
https://developer.wordpress.org/resource/dashicons
https://fontawesome.com/icons
Precautions
Text, photos, HTML, and shortcodes may all be used in tab content sections, which use the regular WordPress text editor. However, LearnDash 3.0 is the only version that Custom Tabs support. If the old template is selected, an error message will appear.